Friday, July 30, 2010

Apron Tutorial


Aprons are beautiful things. They save our clothes from getting dirty. Gather the corners up and they work as impromptu baskets for gathering flowers, fruit and vegetables. Their strings can act as an extra and secure hand a little one can hold on to. They are often a stand-in for towel or pot holders. And in a pinch they can even wipe away tears.

Here at StoneGable aprons are daily attire . I have kitchen aprons and garden aprons and company's coming  aprons. Sometimes I even forget to take them off until I get ready for bed!

So when I spotted this beautiful feminine vintage feeling material I just knew I had found my newest apron...


I am particularly smitten with the color combination. Soft dreamy aqua and coral pinks. The rose motif has a bygone-days feel.


This will start out as a company's coming apron and if it is very lucky, after years and years will end up as a garden apron.


If you like to wear aprons, making them yourself can be very satisfying! 

I have kept this apron's styling very simple and tried to give detailed instructions. You can make this apron in a couple of hours. It is really quite easy and would be a great beginner project. I hope you will soon be wearing your own homemade apron!

StoneGable's Apron Tutorial
1 yard heavy, apron worthy material (mine was on sale at Calico Corner's- decorator fabric)
matching thread
ric rac
large paper grocery bag
colored pencils
ruler
old bib style apron (as template)

Wash and dry fabric.Press. This is an important step~ do not skip it!
Cut a paper grocery bag to open it up. Iron to take out wrinkles. This will become your pattern.

Iron your old apron. Fold it in half vertically as pictured and place on the brown paper.


Carefully trace the apron onto the brown paper. I used a white colored pencil.


Using a ruler, add 1 inch to the pattern.


Cut out the pattern on the red line.


Fold fabric lengthwise as shown. Put pattern on material matching the center edge of the pattern with the FOLD of the fabric. See picture.


Pin pattern to fabric. Pin, pin,pin!


Cut out apron on the outside edge of the pattern. Remove pins.


Begin by sewing apron SIDES first.  Clip cures on each side of apron just under 1/2 inch. Doing this will help curved seams lay flat and not bunch when sewing.


Fold under 1/2 inch seam allowance and press. Do this for each side of the apron. 


Fold seam over again 1/2 inch. Press and pin.

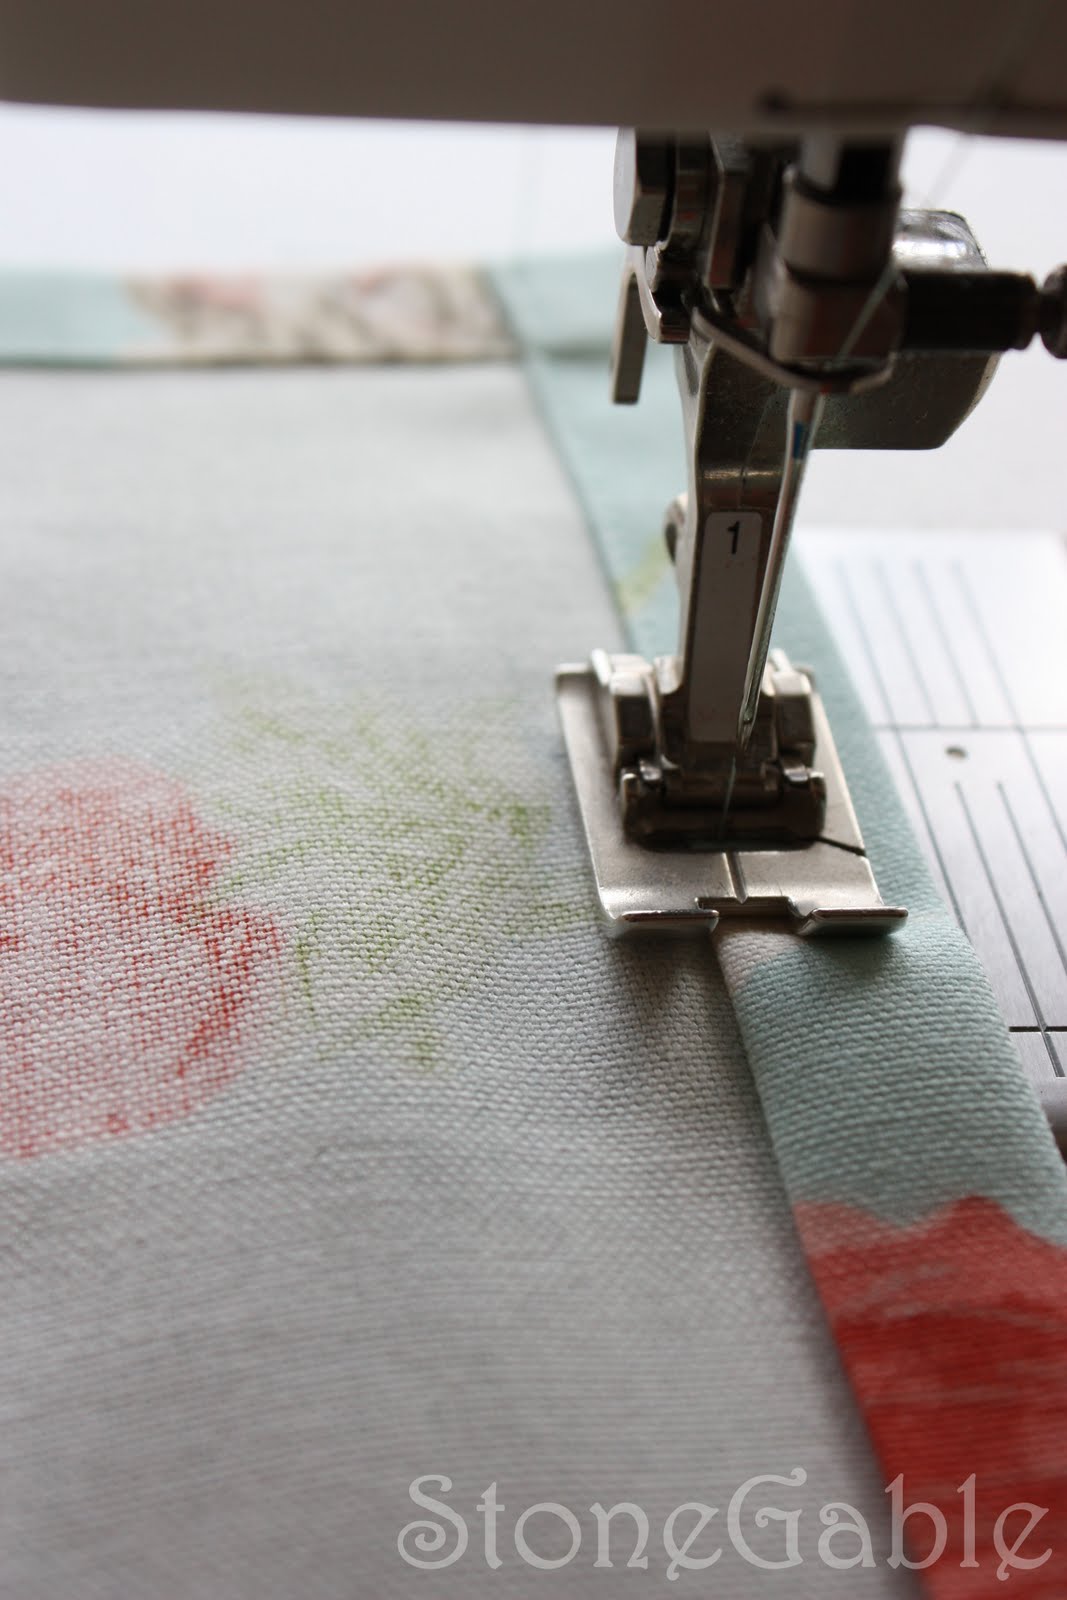
Sew seam close to the inside edge of the seam allowance.


Sew both SIDES of the apron.


Sew the BOTTOM of the apron. Turn 1/2 inch seam allowance and turn over another 1/2 inch like pictures above. Press. Pin. Sew close to the inside edge of the seam allowance, as pictured above.

Sew the TOP of the apron in the same way.


To make the apron ties, cut 2 - 30" x  3" pieces of fabric.


On both sides of the length of the tie, turn 1/4 inch seam allowances to the wrong side of the fabric and press.


Fold in half lengthwise and sew all three open edges close to the edge. Sew the second apron string the same way.


Cut 2- 4 1/2 x 30 inch pieces of fabric. These will be the neck straps.

Sew 2 neck straps using the same technique that was used to make the apron strings.

Sew apron string and neck scraps to apron body. I stitch a  box pattern to secure the strings. See pictures below.


Cut a rectangle out of the material for a pocket. If your fabric has a design, make sure to center the design on the pocket. I made this pocket 18" x 22".


Fold 1/2 inch seam allowances on the SIDES of the pocket. Fold another 1/2 inch amd press. Sew sides.


Fold the BOTTOM  and the TOP of the pocket the same as the sides. Press and sew.

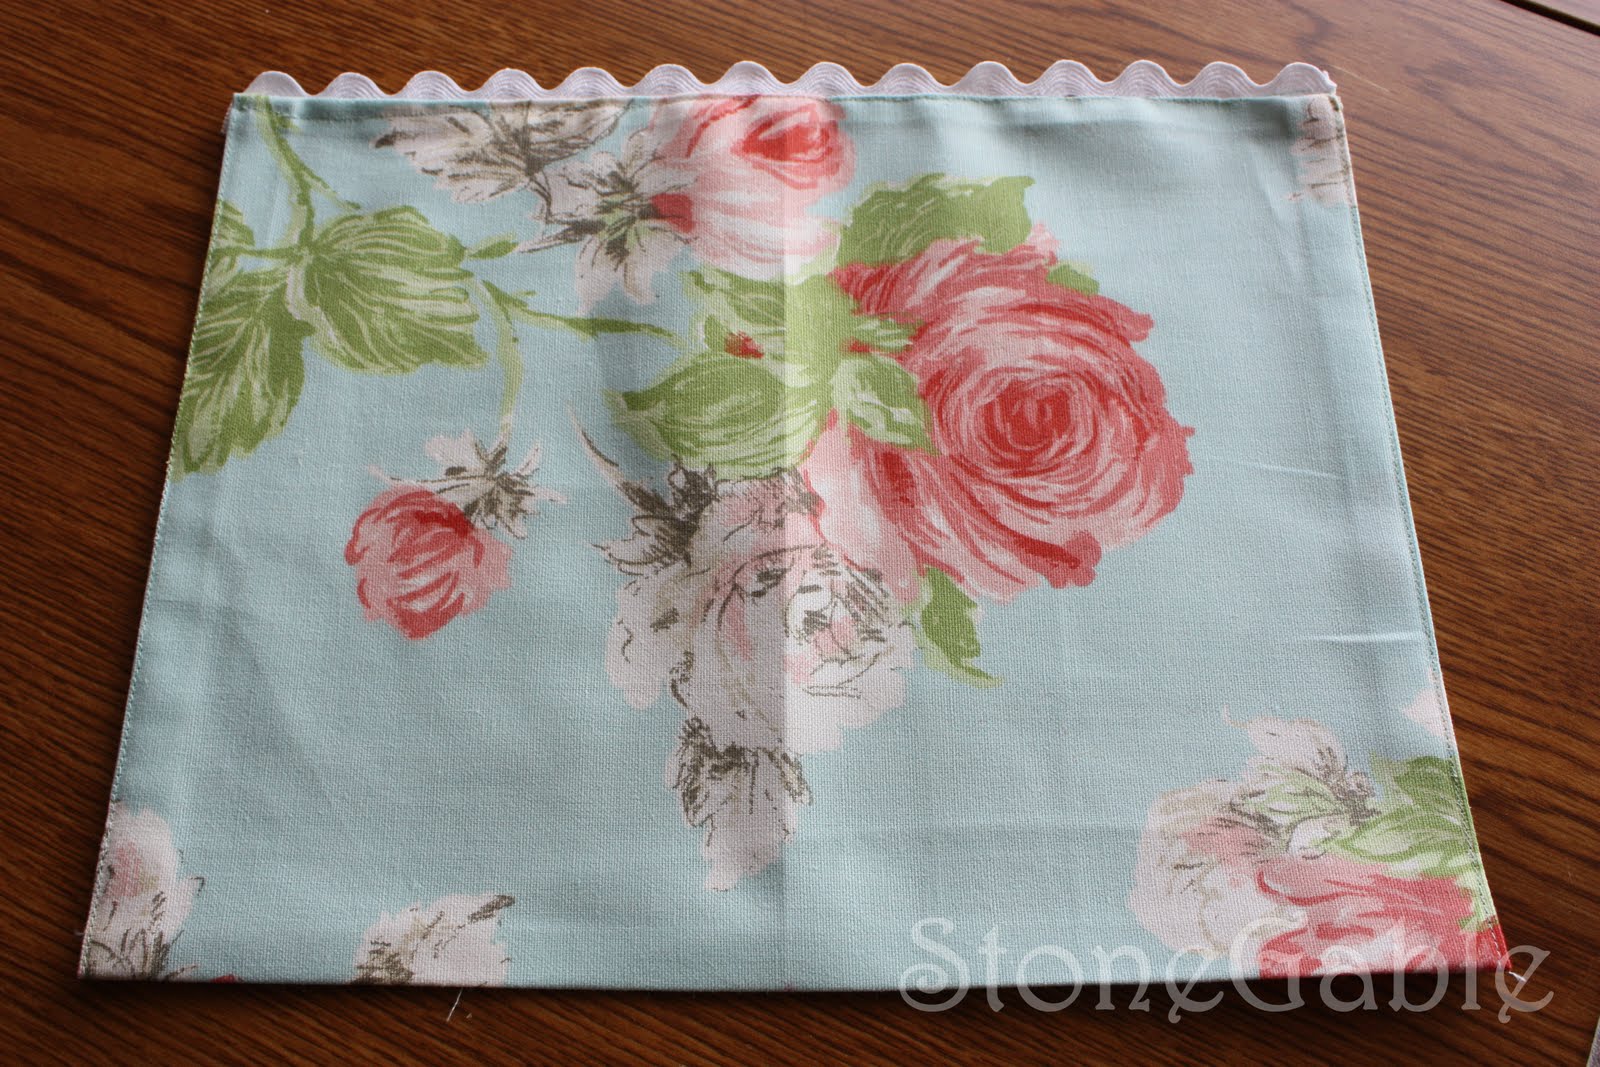
Add ric rac to the TOP of the pocket by sewing it to the WRONG side of the pocket.


 The peaks of the ric rac should stick up from behind the TOP of the pocket when RIGHT side is facing you.


Fold pocket in half vertically and press. Fold apron in half vertically and press.
To position pocket, line up folds. I placed my pocket 6 inches from the bottom of my apron. Pin, pin, pin.


Sew the SIDES and BOTTOM of the pocket to the apron.


Sew ric rac to the TOP of the apron using the same technique as the pocket.

Press and enjoy!


Remember to


Thursday, July 29, 2010

Peach Dumplings


What's not to love about fresh peaches, butter and brown sugar wrapped in a delicate puffed pastry and sitting in a pool of rich creme anglaise? In other words... Peach Dumplings...


The only thing that would make this flaky yummy creation more loved is if it would be served for breakfast! Well call me cupid, and get ready to fall head over heals!


Here at StoneGable dumplings are served for the first meal of the day! In Lancaster County dumplings are common breakfast fare. And not only that, they are served as a main course for dinner! I consider this one of the main perks of living in this beautiful area.

Our peach crop has been exceptional and sweet this year! So I wanted to take full advantage of these just picked lip-smacking beauties.


Traditionally, peach dumplings are made with pie crust, but I have an easier, less time consuming version.  I use store bought puffed pastry instead of homemade pie crust.

I hope you will consider yourselves Lancasterians for a day and indulge in this delicious treat for breakfast or dinner while the peaches are so fresh in season!

StoneGable Peach Dumplings
8 large very ripe peaches
4 TBS butter
1/2 cup brown sugar
1/2 cup white sugar
2 boxes puffed pastry sheets
1/4 cup heavy cream
sanding sugar

Preheat oven to 400 degrees.
Take thawed puffed pastry out of box and roll into a square.


Cut pastry sheet into 4 squares.


Set aside. Cut 2nd sheet of pastry the same way.

Cut out leaves using another puffed pastry sheet. You can cut them out freehand...


Or use a cookie cutter. I have a trio of leaf fondant cutters that are perfect for this!


Score each leaf to resemble leaf veins. Set leaves aside.

SG tip: I use a well floured pastry cloth whenever I work with dough. It makes my pastry life soooooo much easier. I do not use a pastry sleeve for my rolling pin though. Once the cloth has been used and floured several times it will become seasoned. When I am done using it, I shake the excess flour out into the sink and pop my pastry cloth into a freezer bag and then into the freezer.

SG tip #2: Keeping a pretty cup filled with flour on hand  to continually dust the pastry cloth is a good idea. This keeps the pastry from sticking and making a mess, and the cup is pretty to work with! I keep this cup in my flour bin.


Mix sugars together in a bowl. Add soft butter and mash together with a fork. Mixture should be somewhat crumbly. Set aside.

Cut very ripe peaches in half using the natural indent in the one side as a guide. Gently twist and the peach should easily pull apart. It really helps to use freestone peaches.


Remove pit from peach with a sharp knife. Repeat with all peaches.


Remove one puffed pastry square onto a work surface. Scoop a generous tablespoon of sugar mixture in the hollow of one half of a peach.  Put peach together. Sugar mixture will be in the middle. Sit upright on the pastry square.


Bring diagonal corners up and over the peach as shown.


Use a little water to wet the ends of the pastry and gently push them together.

Fold opposite diagonal ends up and over peach tucking in the sides of the pastry.


Using a pastry brush, brush heavy cream on dumplings and cut out leaves. Arrange leaves on dumplings and dust with sanding sugar.


Bake at 400 degrees for 30-40 minutes, until golden brown.


Let cool for 10 minutes.

While peach dumplings are cooling, make an easy creme anglaise. Melt a GOOD vanilla bean icecream in the microwave (shhhhhhhh- don't tell it is not from scratch and no one will know the difference). That's it! Creme anglaies!

Pour creme anglaise into a bowl and gently submerge the peach dumpling into the vanilla yumminess.


If you are having StoneGable Peach Dumplings for breakfast, the traditional way to eat it is with milk poured over it.
Indulge immediately!


Pin It

Tuesday, July 27, 2010

Blue And White Summer Tablescape


Blistering heat and soaring humidity has kept me inside at StoneGable. The inspiration for this calm and icy blue table was the weather! 

Done a couple of weeks ago during the height of a heat wave, I wanted a table that would be a break from the heat for our friends... and us too!


The only time I ventured outdoors was to quickly cut these fabulous blue hydrangeas from a bush in the back of our home.  Even they needed to come in from the heat, when I first picked them they were languishing.


Each place was set with a mix of blue and white dishes sitting on a cool blue straw placemat.


The blues in the plates, tablescloth and placemats were all a little different. It is fascinating to me to see elements play nicely together. A dark blue and white dessert plate gives the weight this stack of dishes needs for interest.


Delicate vintage sherbet dishes top each setting. I think these sweet sherbets are so winsome! Their little pedestal and wide bowl, make them so visually lovely. They are a new to me treasure, and what a bargain at $2.00 a piece!


Speaking of bargains... and I love a great bargain... the blue glasses were a GW find at 5 for $4.97! Aren't they a beautiful color?


Just a little soapbox note... I enjoy lovely things. And I am blessed to have lovely things. But I also love a bargain!  Beautiful things don't have to be expensive, and in my case often aren't. I mix the treasures that were passed down to me with things that cost very little. Style shouldn't equate to dollars. How we elevate, share and hold loosely onto the things we have in our own individual ways~ now that's true style!

And things don't equate to happiness! My mantra is and always has been "people are more important than things". I love home and have a passion for making my home a sanctuary for my family and all who visit. It is the  people that fill my life that give it meaning and joy! And so, I am blessed beyond measure!  But you all knew that, didn't you!

I'll step down off of my soapbox and back away from the megaphone~ thanks for giving me a minute~ and now back to the table..


Tucked into the blue glasses are crisp white hemstitched napkins.


These sweet cups and saucers came from a flea market, as did the small candle holders. They were in a Styrofoam ice chest filled with blue and white goodies for $4.00! I kept the things I wanted and passed the rest on to friends and GW. One man's trash is definitely this woman's treasure!


A blue and white patterned tablecloth adds depth and again plays nicely with the mix of patterns in the dishes and centerpiece. I am wild about mixing patterns!  Talk about instant interest!

The tablecloth was not the proper size to fit the table, but I love the juxtaposition of the table edges and the tablecloth corners! Who said tablecloths have to cover the whole table?


Cobalt blue salt and pepper shakers, a gift from my daughter Jacqueline and her prince charming of a husband, give a pop of intense blue color to the table.


When having a crowd or company I often put a second set of salt and pepper shakers on the table. These are a pretty blue transferware.


If there is room I like to set dessert plates, and sometimes dessert, on the table. Elevated on a white cake stand are plates, dessert napkins (extra washing, but a lovely touch) and dessert forks.


I have a love affair with silver! Most of my silver is silverplate, and collected from antique shops, flea markets and GW.  It is all beautiful to me! Especially swoon worthy is a piece of silver with any letter for monogram on it. If you are interested in silver too, you might want to see my post on "Beautiful Things, Silver and it's Care" . Click HERE to view.


The ginger jar centerpiece is filled with take-my-breath-away hydrangeas from my garden. This has been my best hydrangea year ever!!!! They were a little wilty when I first brought them in, but some nice cool water and a pretty container perked them right up!


One more look at (sigh) these blue beauties!


StoneGable's Too Hot Outside To Eat Menu

Ceasar Salad With Crabcakes
Homemade Beer Bread
Fresh Tomatoes
Raspberry Fluff Individual Tarts
Persecco
Iced Tea
Coffee