
In the story Alice in Wonderland, the Queen of Hearts, a very bossy and demanding woman, was ALL ABOUT the color red!!!
She loved red so much that even the her white roses became red! She ordered her card-shark knaves to slap a coat of red paint on the snowy blooms in her royal garden!
As I was painting my curtains, the song "Painting The Roses Red" from the Disney movie Alice In Wonderland kept running through my head!
But here at StoneGable, the zippy little tune went something like this...
"I'm painting the curtains white... I'm painting the curtains white... do-Do...do-Do...do-Do... do-Do...
I'm painting the curtains white!"
I'll show you how I did it...

The idea to paint my curtains just popped into my head one day!
To be perfectly honest, I haven't been very satisfied with the family room curtains for a long time.
To be perfectly honest, I haven't been very satisfied with the family room curtains for a long time.
Replacing them was out of the question. They are Belgium linen from Restoration Hardware... very very nice... but very very blah in my neutral family room!!!
Because they were staying, I thought painting a bold pattern on them would give them the umph they needed to bring a shot of interest to my room!
Here is how the curtains looks "before"... YAWN!

And here's the "After"...

This was a SUPER EASY project... especially after I got over the initial hold-your-breath-fear of ruining the curtains!
I really should have read up on painting curtains or at least seen a couple of youtube videos!!!
I had heard somewhere that Annie Sloan Chalk Paint could be painted on fabric... and that is just what I did!
And yes, you can paint on fabric and the result is fabulous!!!!
Annie Sloan Chalk Paint Stenciled Curtains
Large Scale Stencils ~I got mine HERE
Curtains~ iron them first
Annie Sloan Chalk Paint ~ I used Pure White
Small Sponge Roller
Paint Tray
Water
Painter's Tape
PREPARE YOUR WORK SURFACE
Put down a plastic drop cloth and then a cloth drop cloth. Paint soaked through my curtain and the cloth drop cloth
START WITH A PLAN
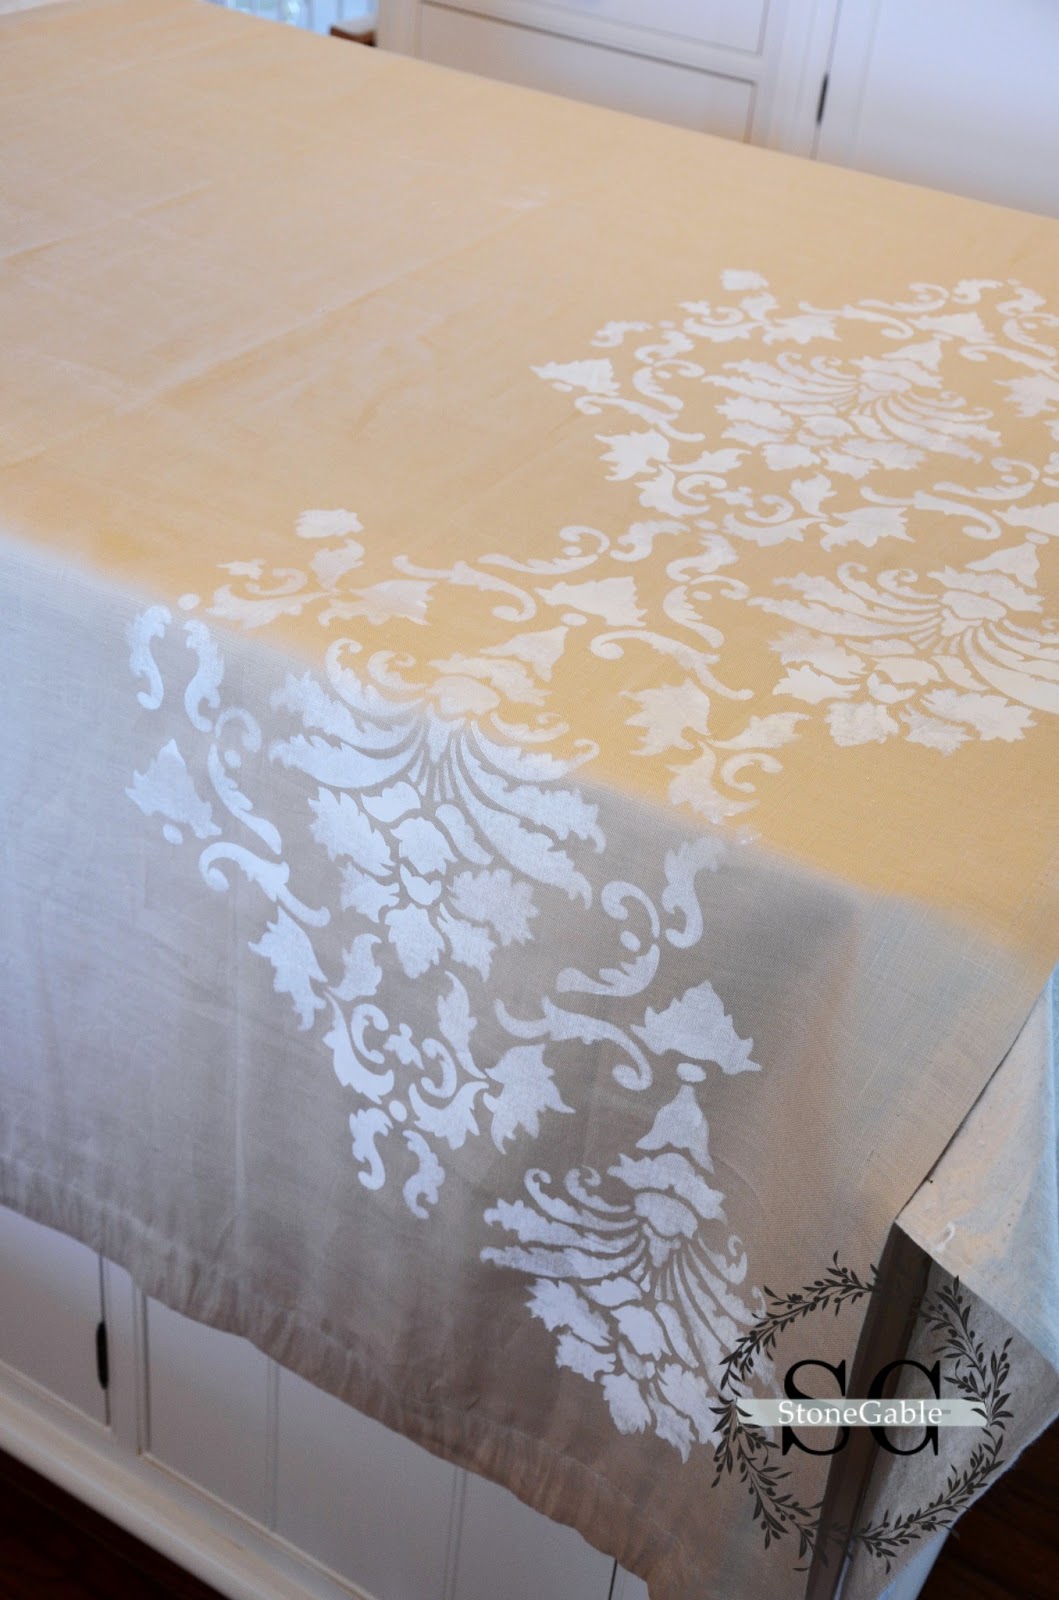
Think through how you will stencil. Where will you begin stenciling? Your stencil design will dictate where you begin and how you proceed from there.
My stencil was a big damask print. I measured my stencil and a curtain panel and determined that I would start at the top left side and work down and then across.
Because I did not want an all-over pattern I stenciled in three rows. Left ... then right... then an accent down the center.
LET'S BEGIN
Lay the stencil down at the beginning point. Tape it to the fabric.
As I got more confident stenciling, I just taped down the top and rolled the paint on in a downward direction only.

PREPARE TO PAINT
Use a small sponge roller and the paint of your choice in a small paint tray. Wet the sponge roller thoroughly and squeeze out any excess water in the roller.
You might want to practice before you commit your roller filled with paint to your curtains!!!!
STENCIL
Here's what worked for me... I thinned down my paint a little and used a damp roller to stencil. The paint went on very easily. It was important to me that the stenciled pattern was not painted solidly, but had areas of light paint application. This gave the pattern an old, washed-out look.
I rolled over the stencil primarily in a downward direction.

This is not rocket science and mistakes aren't noticed.
MOVE THE PATTERN AROUND THE CURTAIN
I lifted the pattern off the curtain and placed it to the side to dry. This is a project that should not be hurried. Make sure your stencil is dry before stenciling the next spot on the curtain.
I used a small fan to keep the process moving along.
DRY COMPLETELY AND HANG
Let each curtain panel dry completely before you hang it.
I was surprised at the weight and body the paint gave my curtains.

I don't know if the curtains can be washed or dry cleaned. I sorta doubt it since ASCP is water soluble.
I have no intention of dry cleaning these drapes. I'll vacuum them and maybe Scotch Guard them.
When they get faded or dirty, I'll probably be tired of them and ready for new curtains!
You can see how my newly painted curtains look in my family room by clicking, HERE.
Since this was such an easy and successful project I'm thinking about all the other great painting possibilities... stenciling fabric and using it to cover a seat of a chair ...stenciling lamp shades...or even painting it!!!!
I have 4 smaller curtain panels just kicking around. I think I'll be making some pretty stenciled pillows!


0 comments:
Post a Comment